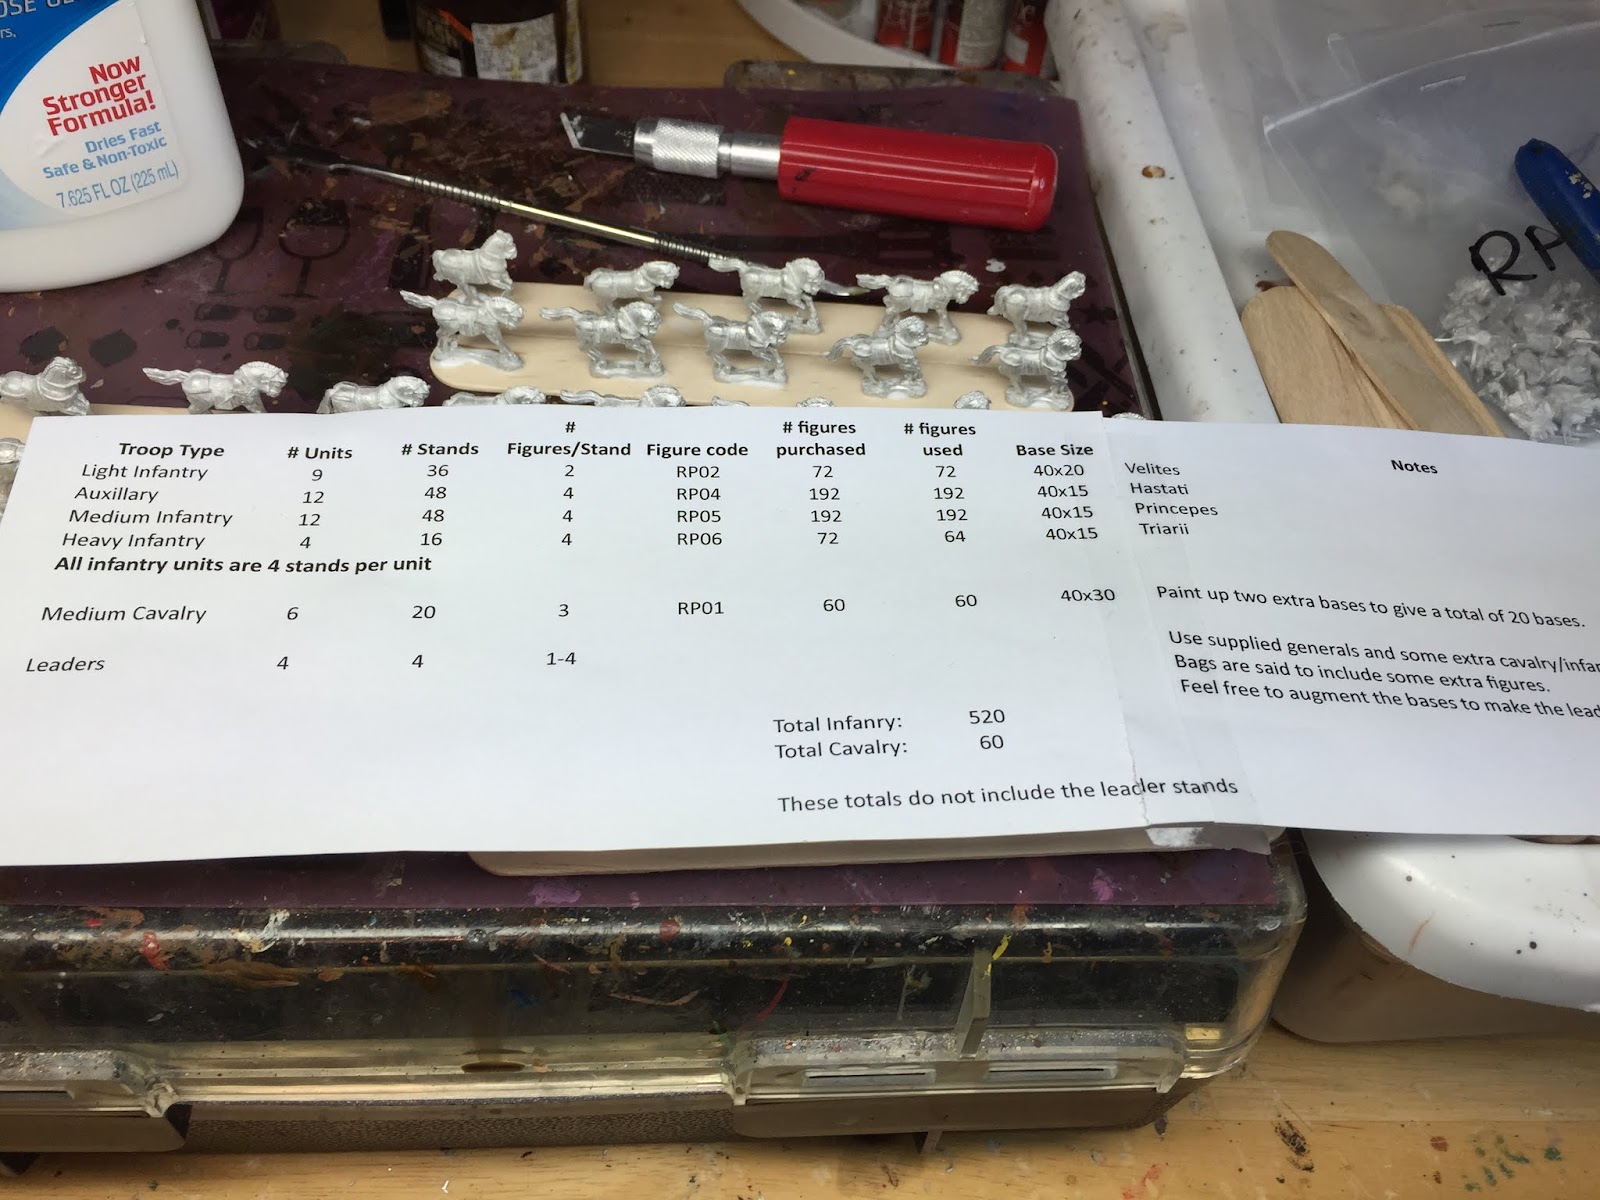
Before you start, it's important to map out what you need at the finish line. I don't always do this and I invariably regret skipping this important step. It's faster to paint an army in one go rather than in dribbles and drabs. For big projects, you might even drop your plan into a table like this one.
So, onto The Method:
1. Clean up mold lines and flash. If shields are separate, attach using the “Ticky Tack Stick" method. Zip Kicker or similar CA glue accelerator is highly recommended for this.
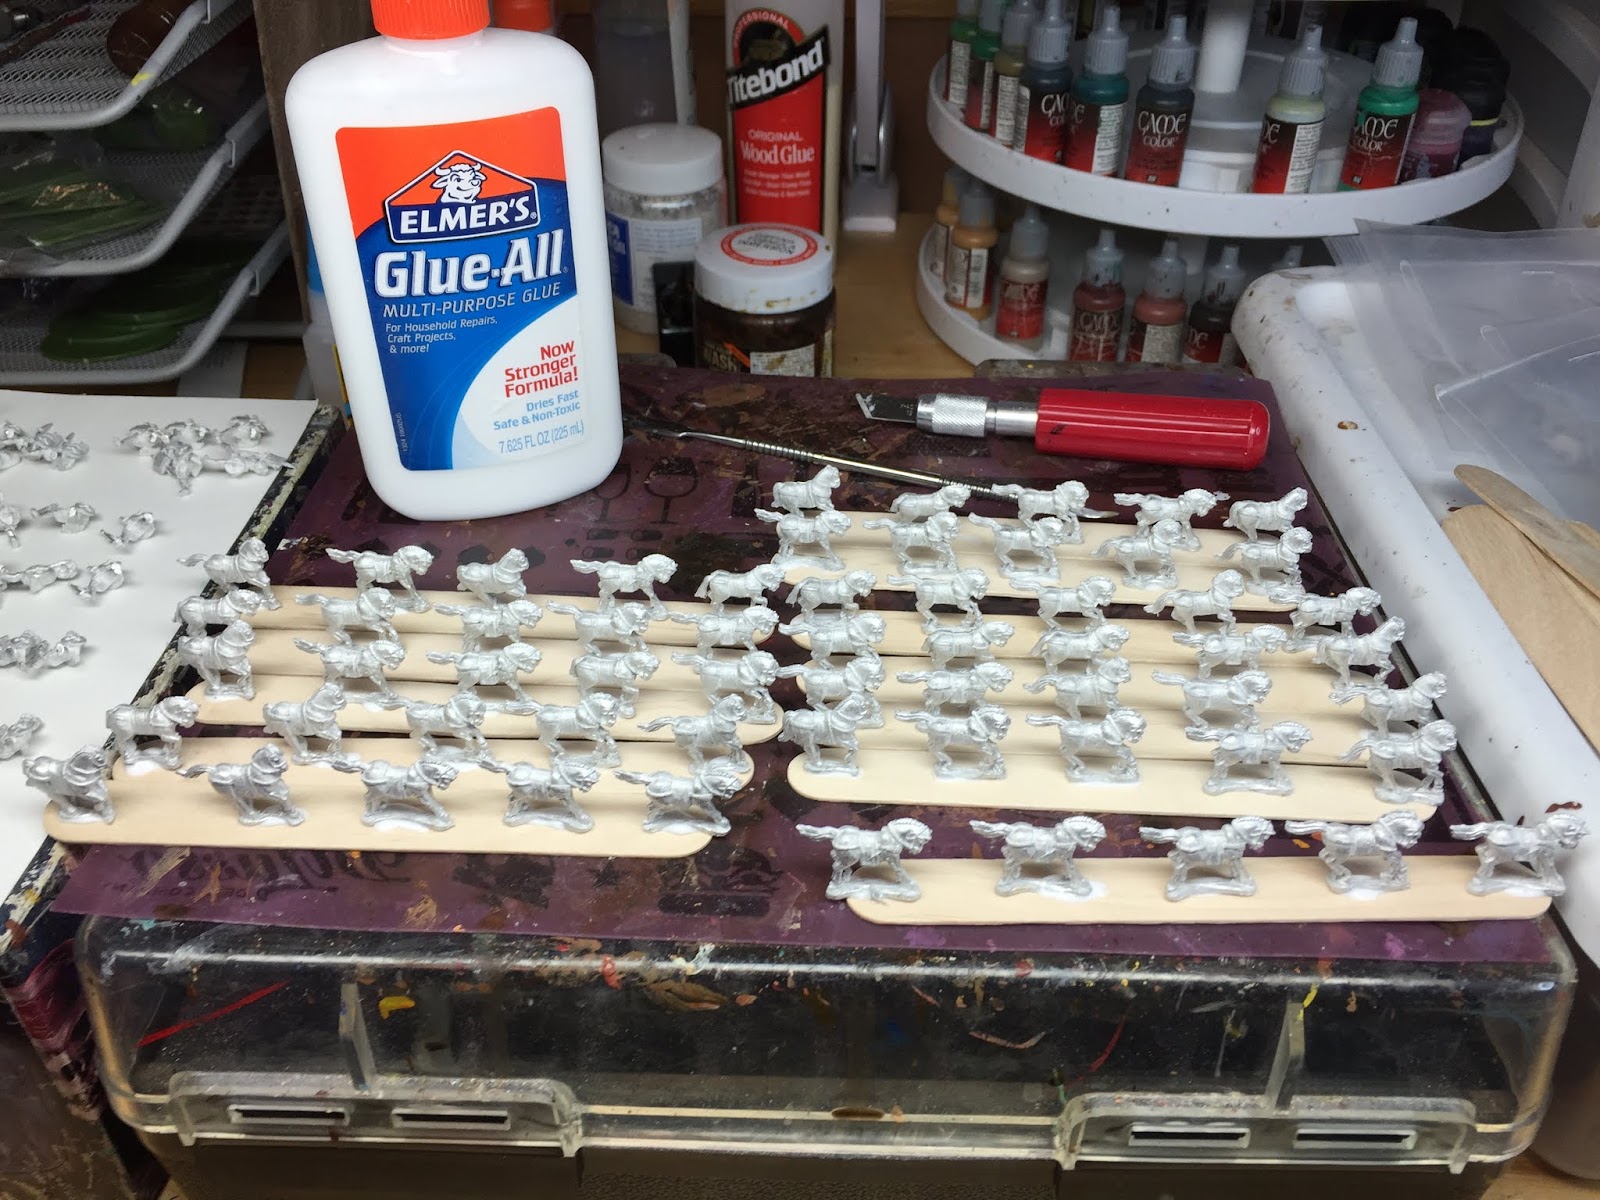
2. Group similar figured poses together and
mount 4-6 figures on a craft or ‘popsicle’ stick using white glue. Similar poses
on the same stick speeds up painting. Leave enough space between figures so you can get at each one with a brush.

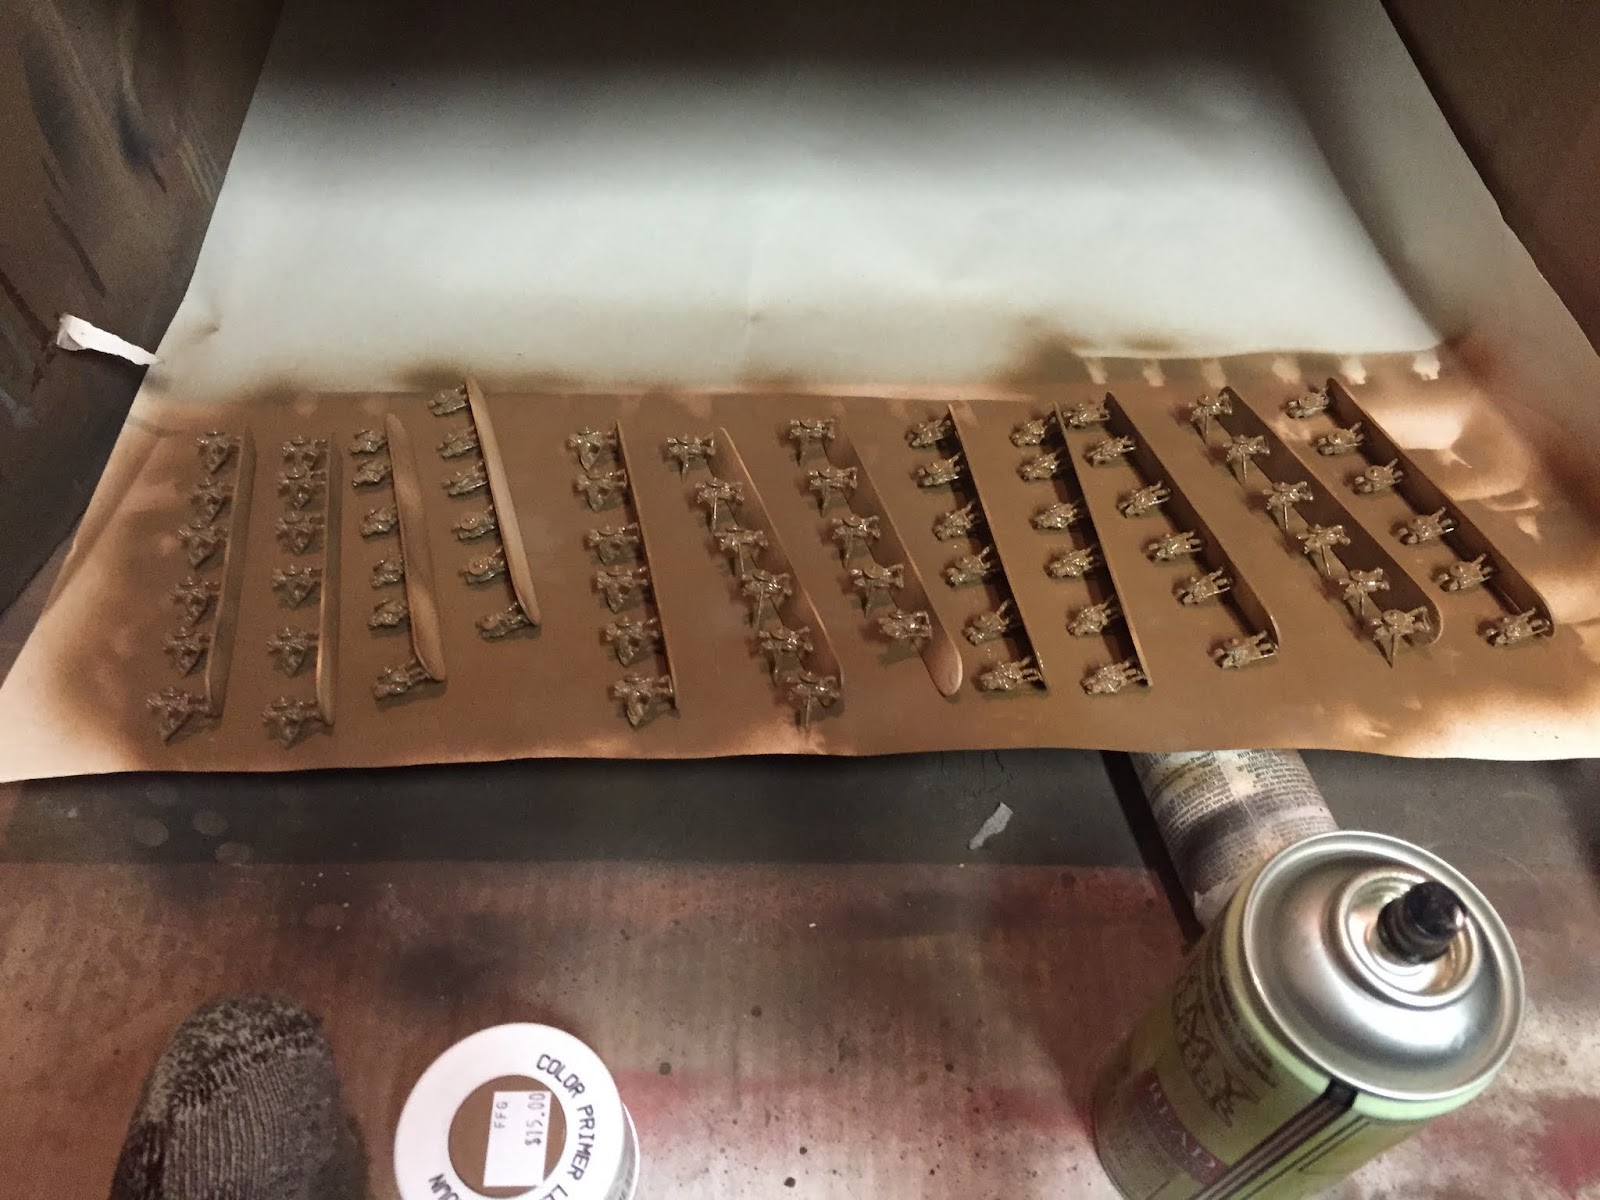
3. Prime with Army Painter Leather Brown
spray primer. This is a time saver as you'll see later on.
4. Block paint in your base colors:
A. Flesh on faces (not arms, hands or legs yet!)
B. Brass or bronze
on metal helmets, greaves, shield boss, breast plates.
C. Black on metal
parts of weapons—spear heads, pilum shafts, sword blades—and plumes too.
D. Shield base
color (can also do after wash step if you want a brighter shield color)

5. Paint on a heavy brown wash. I recommend Vallejo's Game Color Sepia Wash or Army Painter Strong Tone.
In 15mm, I don’t mind the wash pooling as the shadows will help your highlight colors pop. Let the wash dry completely before proceeding.
6. Apply highlights:
A. Flesh on hands,
arms, legs, and highlight face if you think it's too dark from the wash. You can highlight the forehead, cheeks, and chin if you'd like. For sandals, hit the toes with touch of flesh and it’ll
pop nicely.
B. Metal on
swords, spear points, and pilum shafts.I like to leave a little bit of black
showing between the metal and wood on spear shafts for contrast.
C. White/linen tunics
or other tunic color. Leave wash/primer color in the recesses for shading and
just paint the raised areas of the tunic.
D. Paint neatly and
the AP Leather Brown primer can be left 'as is' on boots/sandals, belts, and
backs of shields as a time saver!


E. Lighter brown (or red leather brown) on leather belts/straps highlights leaving darker brown wash in borders and recesses.
F. Highlights on helmet plumes or other decorations in appropriate color.


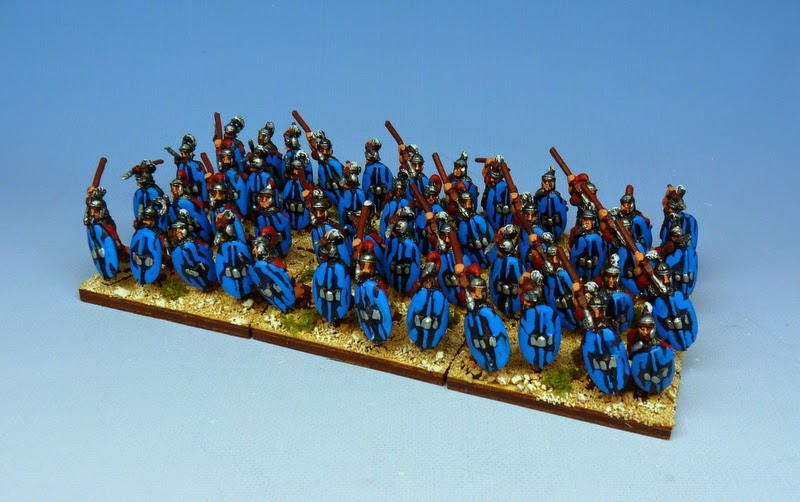
G. Paint shields your chosen base color then highlight with a brighter color with ‘dots’, ‘wiggles’ or ‘arcs.' Leave the base color showing through and a bit of the wash in the deepest recesses/borders to get three colors for depth—base, wash and highlight. Detail with patterns/symbols appropriate to army. You can also use shield transfers but in 15mm, I find it's quite time consuming. Take your time on the shields as they are the most visible part of your ‘ranked up’ ancient infantry.
H. If the brown sepia wash dulled the bronze colors too much, you can give them a quick highlight to along the tops and edges to make them pop.


Great guide, Monty!
ReplyDeleteCheers,
Aaron
thank for this guide.
ReplyDeleteWe use a very similar method and actually the first phase is very important. Indeed what could appear as a waste of time you are not and then we realize that it is a real time saver.
Thank you for remember it here
Thanks man! I appreciate it.
DeleteGreat tutorial! Thanks for sharing.
ReplyDeleteCheers for the guide.
ReplyDeleteI will definitely be giving it go very soon